Make a Halloween 3D Character with AI | V2Fun Guide
Use V2Fun, an AI 3D creation platform, to make a Halloween Vtoo with an AI 3D Model Generator, image-to-3D workflow, 8K PBR textures, and publishing steps.

You do not need traditional modeling experience to create a Halloween-ready 3D character. V2Fun is an AI 3D creation platform for generating, animating, and controlling 3D characters, models, and motions. This guide focuses on one practical production path: create a clear character image, turn it into a model with the AI 3D Model Generator, apply an 8K PBR texture, and prepare the finished work for publishing.
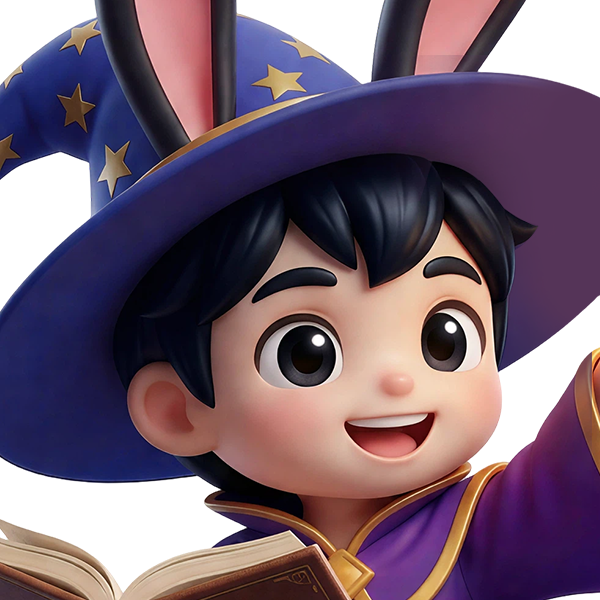
The project starts with Vtoo, V2Fun’s official character. The supplied reference set contains front, left, back, and right views as four 2048 × 2048 PNG files. You may work from one image or several aligned views, but the final design should remain recognizably based on Vtoo and communicate a clear Halloween theme.
> Ready to begin? Visit the V2Fun Halloween 8K Universe event page to download the official references and review the current rules before creating your entry.
Halloween AI-to-3D Workflow at a Glance
| Stage | Input | Output |
|---|---|---|
| 1. AI image | Official Vtoo reference and a focused Halloween prompt | A clean, modeling-friendly concept image |
| 2. 3D generation | One concept image or several consistent views | A complete 3D model |
| 3. 8K texturing | The model plus a text or visual reference | A textured model with PBR material maps |
| 4. Publishing | A reviewed public model | A challenge-ready work ID |
Remember the most important production distinction: geometry controls the shape, while texture controls the surface appearance. A high-resolution texture cannot correct a broken silhouette or disconnected accessory.
Before You Start
Prepare the following:
- A V2Fun account.
- The official Vtoo reference ZIP from the event page.
- One clear direction, such as pumpkin spirit, friendly ghost, tiny vampire, forest witch, monster, or dark fantasy.
- Three priorities for the result, such as preserving Vtoo’s silhouette, adding one readable costume feature, and using a consistent material style.
Avoid combining every Halloween idea in one design. A recognizable silhouette and one strong theme are usually more effective than many small decorations competing for attention.
Step 1: Download and Study the Official Vtoo References
Download the official multi-view PNG set from the Halloween 8K Universe page. A single front view is the fastest starting point. Multiple views give the generator more information about the sides, back, and depth of the character.
Before changing the costume, identify the traits that make Vtoo recognizable. Preserve those core identity cues and build the Halloween design around them rather than replacing them.
Choose One Clear Creative Direction
Use this formula:
Vtoo identity + Halloween archetype + material style + mood
Examples:
- Vtoo + pumpkin spirit + felt and carved pumpkin shell + playful
- Vtoo + tiny vampire + velvet and satin + elegant
- Vtoo + friendly ghost + translucent cloth + curious
- Vtoo + forest witch + wool, leather, and aged brass + magical
This structure keeps the concept focused while giving the image generator useful information about shape, surface, and atmosphere.
Step 2: Generate a Modeling-Friendly Character Image
Open the V2Fun AI Image Generator and upload an official Vtoo image as the reference. The reference helps retain the character’s structure, while the prompt defines the costume, palette, pose, and materials.
V2Fun’s supplied guidance recommends organizing the prompt around subject + style + pose + angle. For image-to-3D work, clarity is more valuable than a dramatic illustration.
Halloween Character Prompt
> Create a Halloween makeover of Vtoo while preserving the recognizable original silhouette, facial identity, and proportions. Dress Vtoo as a friendly pumpkin spirit with an oversized carved-pumpkin hood, a dark-green leaf cape, and small aged-brass bells. Use a warm orange, charcoal, and forest-green palette. Show the full body in a front-facing neutral pose with a centered composition, clean light-gray background, even studio lighting, unobstructed silhouette, no cropped body parts, clear material separation, and crisp surface details. Use a stylized 3D character-concept look rather than photorealism.
Replace the pumpkin costume with your own idea, but retain the production instructions: full body, centered subject, clean background, even lighting, and unobstructed silhouette.
Recommended Image Setup
- Use a square 1:1 or portrait 3:4 canvas so the complete character fits comfortably.
- Keep the subject centered and fully visible.
- Prevent scenery, shadows, or props from touching the silhouette.
- Avoid hidden limbs, extreme perspective, heavy shadows, and objects crossing the body.
- Use Optimize Prompt if you want additional spatial, material, or texture detail.
- Consider 3D Reference, T-Pose, or Generate Multi-View when you need modeling-oriented inputs.
Select the Best Modeling Reference
Do not choose a result only because it is the most attractive illustration. Choose the image that provides the clearest structural information:
- The silhouette is readable from head to feet.
- The proportions are balanced and believable.
- The face and overall form still read as Vtoo.
- Costume layers and accessories are visibly separated.
- No decorations float, fuse together, or disappear into the body.
- Materials are distinct enough to guide later texturing.
If the back of the costume matters, create consistent side and back views before generating the model. This reduces the amount of hidden geometry the system must infer.
Step 3: Build the Model with the AI 3D Model Generator
Send the approved concept into the V2Fun AI 3D Model Generator. Use a single image for fast iteration or multiple aligned views when the costume has important side or back details.
| Input method | Best for | Main trade-off |
|---|---|---|
| Single image | Quick tests and simple costumes | Hidden surfaces and the back are inferred |
| Multiple views | Capes, tails, layered props, or important back details | References must remain consistent across views |
Generate and Review the Model
- Select the image-to-3D or multi-view workflow.
- Add the approved image or aligned reference views.
- Start the generation.
- Rotate the result in the 3D viewer.
- Compare more than one generation if the first model is structurally weak.
- Continue to AI texturing only after the geometry passes review.
Run a 60-Second Geometry Check
Rotate the model slowly and inspect:
- Silhouette: Does the character still read as Vtoo from the front, side, and back?
- Face: Are the eyes, mouth, and other identity features clean?
- Proportions: Are the head, body, limbs, and feet balanced?
- Accessories: Are the hood, cape, bells, horns, or props connected correctly?
- Back view: Did the generator create distracting or unexplained shapes?
- Ground contact: Do the feet sit evenly without obvious floating or merging?
If the central shape is wrong, improve the reference image or compare another generation. Do not move to detailed texturing in the hope that surface detail will repair geometry.
Step 4: Generate and Inspect the 8K PBR Texture
After the model passes the geometry check, move it into the V2Fun AI Texture Generator. According to the supplied feature information, the workflow supports 8K PBR material generation using text prompts, a single reference image, multiple references, or the original modeling reference.
PBR Maps in Plain English
- Albedo: The base color without baked lighting.
- Normal: Small surface details such as fibers, seams, or carved grooves.
- Roughness: How matte or glossy a surface appears.
- Metalness: Which areas respond to light like metal.
You do not need to paint each map manually. Focus on describing the intended materials precisely and checking whether they behave correctly under light.
8K Texture Prompt
> Apply soft orange felt to the pumpkin hood with fine fabric fibers and subtle stitched seams. Use matte charcoal wool for the body costume, satin dark-green fabric for the leaf cape with gentle folds, and aged brass for the bells with controlled metallic shine. Keep clean material boundaries and a cohesive warm Halloween palette. Preserve Vtoo’s face and eye colors. Add rich surface detail while maintaining a stylized, non-photorealistic finish.
Name both the object and its material behavior. Aged brass bells gives the generator more useful direction than gold details, just as matte wool is more specific than dark fabric.
Inspect the Textured Model
Rotate the model again and check:
- Look for seams or abrupt color changes on the sides and back.
- Confirm that the face remains clean and readable.
- Check that fabric and other rough surfaces are not unintentionally glossy.
- Make sure metallic shine appears only on the intended metal parts.
- Inspect small accessories for bleeding colors or unclear boundaries.
- Use the available HD detail enhancement before export if the surface needs sharper detail.
For complex costumes, multi-image texture guidance can improve consistency around the complete model. The supplied V2Fun guidance also describes automatic UV unwrapping and texture mapping, allowing beginners to focus on the visual result rather than manual UV preparation.
Step 5: Check the Challenge Requirements
Before publishing, confirm that:
- The character is still recognizably based on Vtoo.
- The Halloween concept is immediately understandable.
- The core 3D model was generated with V2Fun.
- Any external software was used only for minor repairs rather than rebuilding or replacing the core model.
- The character looks complete from every side.
- Materials are consistent and the face remains clean.
- The work can remain public for the required event period.
According to the supplied official FAQ, a qualifying published 3D model is sufficient. Animation and video are optional, so this tutorial does not treat an animation workflow as a submission requirement.
Step 6: Publish and Submit the Work
Publish the finished model from your V2Fun workspace or enter through the campaign page. Select the official Halloween activity tag and keep the work public as required by the event rules.
The supplied event information states that each work ID can be submitted only once. A separately published edited version may be entered as a new work. It also lists a submission deadline of October 31, 2026, at 23:59 EDT and requires CC0 during submission. Because event terms can change, verify the deadline, license, visibility requirement, and submission form on the official page immediately before publishing.
Common Image-to-3D Problems and Fixes
| Problem | Likely cause | Practical fix |
|---|---|---|
| The result no longer looks like Vtoo | Too many identity features changed | Strengthen the official reference and simplify the costume |
| Body parts or costume edges are cropped | Framing is too tight | Use 1:1 or 3:4 and request a centered full-body view |
| The front looks good but the back is messy | Only one visible reference was supplied | Generate consistent side and back views |
| Accessories merge into the body | Shapes overlap in the concept image | Separate props from the silhouette and use even lighting |
| The texture looks flat | The prompt describes colors but not materials | Add terms such as felt, wool, satin, leather, or aged brass |
| Random areas look metallic | Metalness is not clearly assigned | State exactly which parts are metal and which must remain matte |
| Texture seams appear around the model | One reference does not explain every surface | Use multi-image guidance and inspect all sides before export |
Final Pre-Publish Checklist
- Can viewers recognize Vtoo immediately?
- Is the Halloween concept clear within one second?
- Is the full character structurally complete?
- Does the design work from the back as well as the front?
- Do the materials respond to light as intended?
- Did you select the official activity tag?
- Did you verify the current CC0 and public-visibility requirements?
- Did you confirm the deadline on the official event page?
The fastest way to improve is to fix one production layer at a time: concept image first, geometry second, texture third. This prevents you from polishing a model whose underlying structure still needs work.
Create Your Halloween Character with an AI 3D Model Generator
A reliable Halloween character workflow follows a clear order: reference image → concept image → AI 3D Model Generator → geometry review → 8K PBR texture → publishing. Keep Vtoo recognizable, make the theme readable, and resolve structural issues before investing time in surface detail.
> Download the official Vtoo references and review the current Halloween 8K Universe rules before submitting your creation.
References
FAQ
Can beginners create a Halloween 3D character with V2Fun?
Yes. The core process uses a reference image, an AI-generated concept, image-to-3D generation, and AI texturing. Traditional modeling experience is not required to follow the workflow, although careful visual review still matters.
Should I use one image or multiple views?
Use one image for speed and simple designs. Use consistent front, side, and back views when the costume includes a cape, tail, layered accessories, or other important details hidden from the front.
Can an 8K texture fix incorrect geometry?
No. Texture affects surface appearance, while geometry defines the shape. Regenerate or improve the reference if the silhouette, face, proportions, or accessories are incorrect.
Which PBR maps does the texturing workflow use?
The official V2Fun feature page lists standard maps such as albedo, normal, roughness, and metalness. Together, they define color, small surface detail, glossiness, and metallic response.
Is animation required for the Halloween challenge?
No. The supplied official FAQ says that a qualifying published 3D model is enough; animation and video are optional.