
Little Monster
One model, five colors, thirteen physical parts
Direct work preview
Inspect the parts and assembly
Open the interactive example to inspect this work directly.
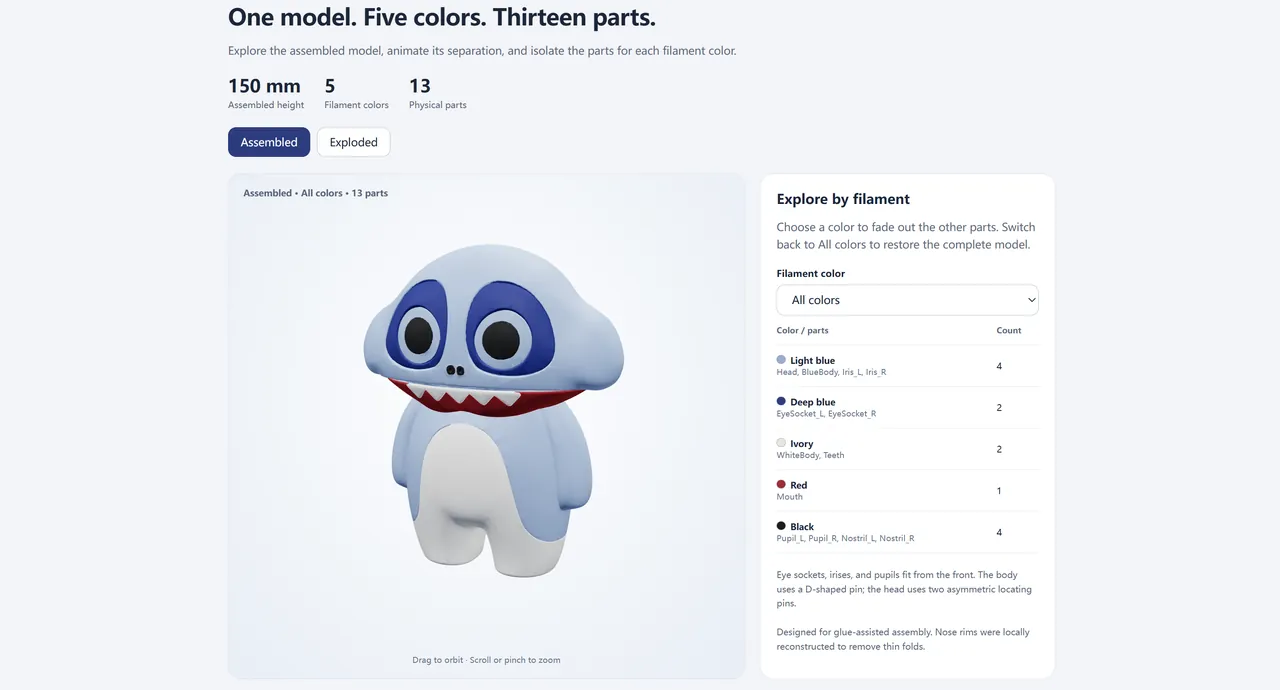
The work and the Skill behind it
What was made
A textured character GLB becomes a 150 mm FDM assembly with five filament colors and thirteen physical parts. The preview shows the assembled model, an exploded view, and part isolation by color.
What the Skill contributed
The Split to Print workflow plans the palette and part manifest, separates geometry, repairs fragile areas, builds locating interfaces, and prepares an offline presentation. It documents print preparation, not a completed physical print test.
Technical details
| Input and scale | Textured character GLB; 150 mm assembled height |
|---|---|
| Part plan | Five filament colors and thirteen physical parts |
| Inspection | Assembled, exploded, color-isolation, orbit, and zoom views |
| Described outputs | Blender project, vertex-color OBJ/MTL, optional per-part STL files, and offline HTML demo |
Take a closer look
From reference to experience
Follow the input, workflow, and final experience. These images show preview states; the production brief describes the underlying work.
01 / Input
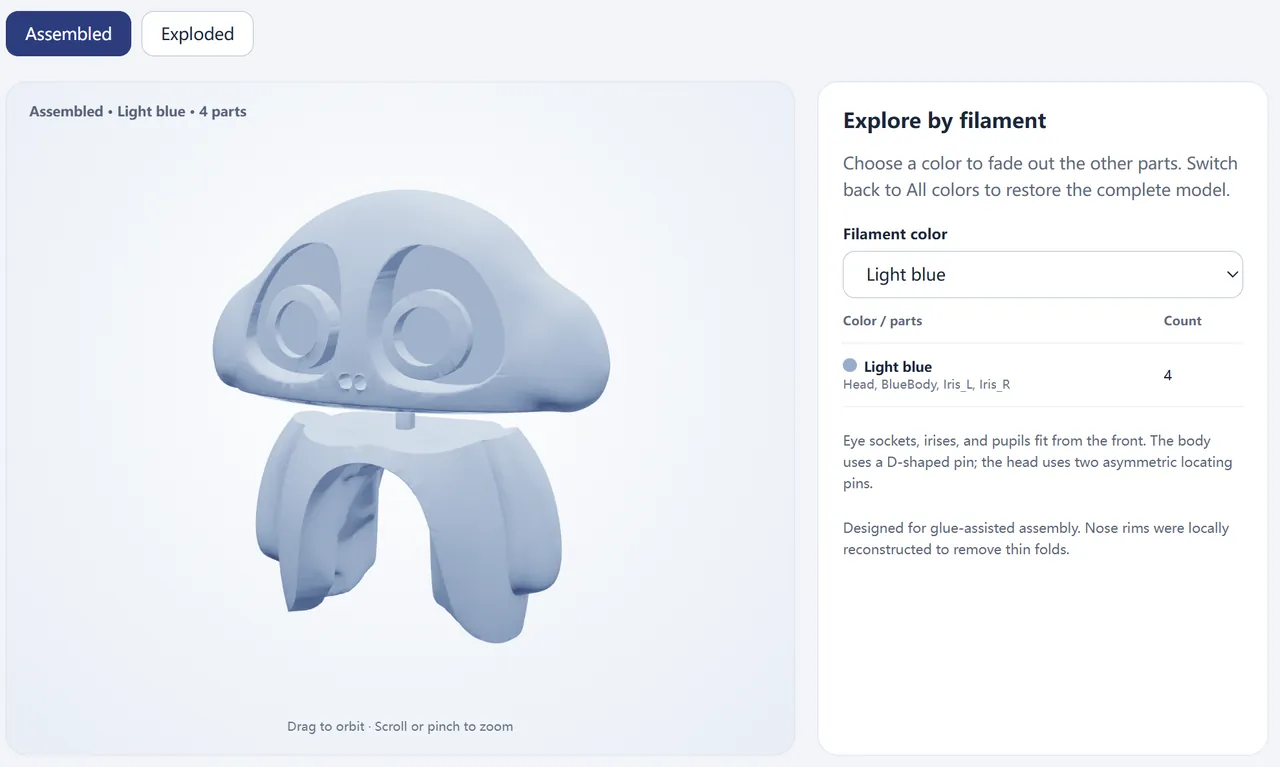
Inspect the source and color plan
The work starts with a textured character GLB and a 150 mm, five-color target. This screenshot shows a light-blue part group isolated in the viewer.
Read the production brief
Use this existing textured character model. Set the assembled height to 150 mm for FDM with a 0.4 mm nozzle, and separate practical single-color parts. Preserve the main features, add locating pins, sockets, and receiving recesses, and deliver an assembled Blender project, vertex-color OBJ/MTL, individual STL files, and an offline viewer with assembled, exploded, color-isolation, orbit, and zoom views.
01 / Input
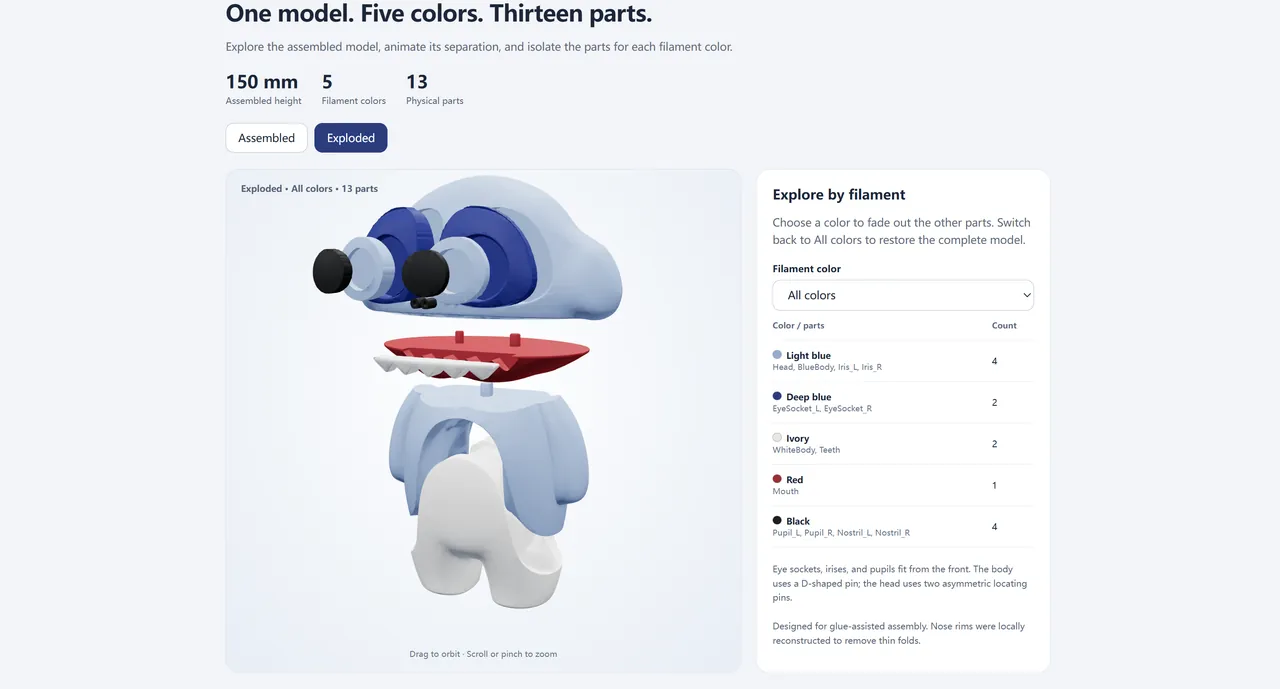
Separate and prepare the parts
The workflow plans thirteen parts, splits along real geometry, repairs fragile regions, and defines assembly interfaces. The screenshot shows the exploded result.
02 / Process
Inspect the five-color assembly
Use the offline viewer to compare assembled and exploded states and isolate parts by filament color.
03 / Final
Frequently Asked Questions
What can I inspect in the preview?
The offline viewer offers assembled, exploded, color-isolation, orbit, and zoom views.
How many colors and parts are in the assembly?
The work describes five filament colors and thirteen physical parts at 150 mm assembled height.
How are the parts located for assembly?
The viewer notes front-fitting eye pieces, a D-shaped body pin, and two asymmetric locating pins for the head.
Which files are described as outputs?
The brief lists an assembled Blender project, vertex-color OBJ/MTL, an offline HTML demo, and optional per-part STL files.
Has a physical print been verified?
The work documents print preparation and an offline viewer, but not a completed physical print test.
Explore More
Explore Infinite Creativity Now
Turn your next idea into a work you can inspect and share.